Auto Ajax
You have seen in the screencast Auto AJAX Explained,
how AribaWeb's simple server side model enables rich client ajax behaviors.
Let's take a work with some of them in details in guide.
We'll build on our GuestBook application as follows:
- Optimize refresh for the rating bar
- Simulate a long running operation with progress update
- Push post updates between clients
In this guide, you will learn the following concepts:
A pre-requisite to this guide is Cycle And Scopes.
Refresh Region
Let's see how much of our page is refreshed by making our refresh regions visible.
We do that by clicking on "AW Options" on the top of the page, then click "AW Config Panel",
and then check "Mark Refresh Regions."
The light green dotted lines border each refresh regions.
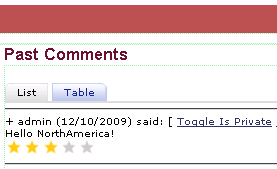
We see one around each post entry.
Click on the rating bar and see that the whole entry gets refreshed.
We can optimize this by putting a nested refresh region about the stars.
So let's add this in RatingBar.awl:
<a:RefreshRegion>
    <a:For count="$^value" index="$idx">
        ...
</a:RefreshRegion>
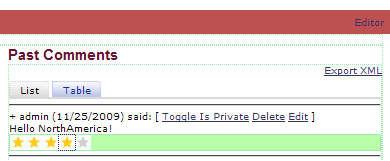
Now rate the post and see that only the rating bar gets refreshed.
If the action affect other refresh regions elsewhere on the page,
those regions will get refresh as well in the same response.
AWRefreshRegion makes this work magically and effectively
by creating checksums of the content and diffing ones from the previous response.
Let's now looking at another Auto Ajax feature...
Long Operation Progress Panel
Let's add an action that batch deletes all the posts.
For such a destructive action, it's a good idea to add a confirmation before firing the action.
So in Main.awl, add this:
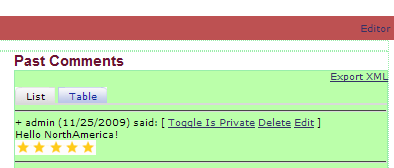
<h1>Past Comments</h1>
<a class="flR" href="$exportURL"


>Export XML</a>
<a:Hyperlink class="postsAction flR" action="$confirmDeleteAll">
    Delete All
</a:Hyperlink>
Then, add the confirmation at the end of Main.awl:
<w:BasicPageWrapper hasForm="$true">
...
</w:FourZoneLayout>
<a:SetValue deleteAllConfId="$requestContext.nextElementId"/>
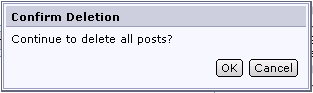
<w:Confirmation id="$deleteAllConfId"
okAction="$deleteAllAction">
<a:Content name="header">
Confirm Deletion
</a:Content>
<a:Content name="content">
Continue to delete all posts?
</a:Content>
</w:Confirmation>
</w:BasicPageWrapper>
Notice that we define the confirmation before BasicPageWrapper,
and not after since it's needs to be in the HTML body tag in the generated page.
When we click on "Delete All", we show the Confirmation.
The actual delete action is executed by the OK button in the confirmation.
Confirmation takes in two optional AWContent for the header and content areas.
We are using AWSetValue to set push a system generated id to a variable in our component.
Let's see how this is tied together.
In Main.java, we define the confirmation id variable:
import ariba.ui.aribaweb.util.AWEncodedString;
...
public AWEncodedString _deleteAllConfId;
Next, we implement the confirm action by using the confirmation id:
import ariba.ui.widgets.Confirmation;
...
public void confirmDeleteAll ()
{
    Confirmation.showConfirmation(requestContext(),
                                  _deleteAllConfId);
}
Click on "Delete All" will display the confirmation.
Let's now implement the actual delete action.
In Main.java, add this:
import ariba.util.core.ProgressMonitor;
...
public void deleteAllAction ()
{
    ProgressMonitor progressMonitor =
        ProgressMonitor.instance();
    int size = _posts.size();
    progressMonitor.prepare("Deleting %s of %s posts", size);
    for (int i = size - 1; i >= 0; i--) {
        progressMonitor.incrementCurrentCount();
        Post post = (Post)_posts.get(i);
        _post.remove(post);
        try {
            Thread.sleep(5000);
        } catch (InterruptedException e) {
        }
    }
}

Click OK in the confirmation, and wait about 10 seconds for the progress panel to show up.
The panel will update itself every few seconds. Using the ProgressMonitor instance,
we can give our users updates on long running operation. This should be used sensibly though.
It might be a wise to make your operation a background task if it does take a long time.
Note that during large file uploads, AribaWeb provides a default progress message indicating
the number of bytes that has been uploaded.
Next, we'll take a look at the AW push feature...
AW Push
The idea is that we want to push server state changes
to the client without the user triggering an action on the page.
Let's try this with user sessions. A post created in one session will
be pushed to the other session.
We start by moving post manipulation logic into a PostServer class.
From Post.java, we move these:
package app;

import ariba.util.core.Fmt;
import java.util.ArrayList;
import java.util.Date;
import java.util.EnumSet;
import java.util.List;

public class PostService
{
    private static List Posts = initialPosts();

    private static List initialPosts () {..}
    private static void addInitialPost
        (List posts, Continent continent) {...}
    public static List postsForContinent
        (Continent continent) {..}
}
Application.oss looks like this with the move:
...
list:${app.PostService.postsForContinent(app.Continent.NorthAmerica)}
...
list:${app.PostService.postsForContinent(app.Continent.SouthhAmerica)}
...
Then from Main.java, we move these:
import ariba.util.core.ListUtil;
...
public static void addPost (Post post) {...}
public static void removePost (Post post) {...}
Main.java looks like this with the move:
public void add () {
    ...
    PostService.addPost(_newPost);
    _newPost = new Post();
}

public void delete (Post post) {
    PostService.removePost(post);
}
In Main.java, we initiate the push and register a callback object
with the PostService:
import ariba.ui.aribaweb.core.AWPage;
import ariba.ui.aribaweb.util.AWChangeNotifier;
...
public void init () {
    AWPage page = page();
    AWChangeNotifier changeNotifier =
        page.getChangeNotifier()
    PostService.registerChangeListener(
        changeNotifier);
    page.setPollingInitiated(true);
    page.setPollInterval(5);
}
Currently, AribaWeb uses a polling mechanism to simulate server push.
The polling interval is in seconds, and it is enabled only for this page.
AWChangeNotifier
In PostService.java, we maintain a list of notifiers:
import ariba.ui.aribaweb.util.AWChangeNotifier;

private static List<AWChangeNotifier> ChangeNotifiers =
    ListUtil.list();

public static void registerChangeListener
    (AWChangeNotifier changeNotifier) {
    ChangeNotifiers.add(changeNotifier);
}
Then, on add and remove posts, we notify them:
public static void addPost (Post post) {
    Posts.add(post);
    notifyChange();
}

public static void removePost (Post post) {
    Posts.remove(post);
    notifyChange();
}

private static void notifyChange () {
    for (AWChangeNotifier notifier : ChangeNotifiers) {
        notifier.notifyChange();
    }
}
The page component needs to reinitialize its list of posts,
but in a synchronized way.
Remember from the Cycle And Scopes guide,
we need to keep any server states that affect the UI unchanged in between the renderResponse phases.
The AWChangeNotifier in turns call back on the page component.
So in Main.java, we can keep a flag to defer re-initialize until the next renderRespons phase like this:
import ariba.ui.aribaweb.core.AWRequestContext;
...
public List _posts;
private boolean _updateList = true;

public void notifyChange () {
    _updateList = true;
}

public void renderResponse (AWRequestContext requestContext,
                            AWComponent component) {
    if (_updateList) {
        _updateList = false;
        _posts = PostService.getPosts();
        _displayGroup.setObjectArray(_posts);
    }
    super.renderResponse(requestContext, component);
}
The technique of overriding renderResponse is useful to ensure that
your component is in a good state before the actual rendering of the AWL.
We also need to do the refactoring in DirectAction.java:
List posts = PostService.getPosts();
if (pi != null) {
    int postIndex = Integer.parseInt(pi);
    posts = ListUtil.list(posts.get(postIndex));
}
Finally, we implement getPosts in PostService.java:
public static List getPosts () {
    return ListUtil.cloneList(Posts);
}
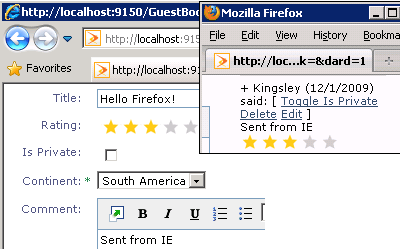
Let's try it out with two different types of browsers to
avoid the cookies getting reused. We launch browser A,
and leave it untouched. Then we launch browser B,
and create a post. Go back to browser A, and notice the new
post appear from browser B!
Other Areas to Explore
Here are a couple more areas that provides Auto Ajax functionality:
- The Drag and Drop guide talks about this simple server side API.
- The Chooser guide walks throught using and customizing this auto-completion widget.
- AWTDataTable has a scroll faulting feature that dynamically brings it data rows as needed.
Back to Documentation